

A blanket ladder is handy to have around, but buying one can cost hundreds! Save money and make your own with these easy-to-follow instructions.
This post contains affiliate links.
Imagine having a stylish and practical solution for storing and showcasing your beloved blankets and quilts. With a blanket ladder, you can achieve just that.
Blanket ladders provide a functional way to organize and display your favorite blankets, quilts, and throws but also add a touch of farmhouse charm to your home décor. The best part? Making a blanket ladder is not hard at all! I will share a simple, step-by-step process to create a quilt ladder that fits perfectly in your home and interior! So, get ready and roll up your sleeves because we’re unleashing your inner DIY enthusiast and we’re creating our own unique cozy haven!
What Is a Blanket Ladder?
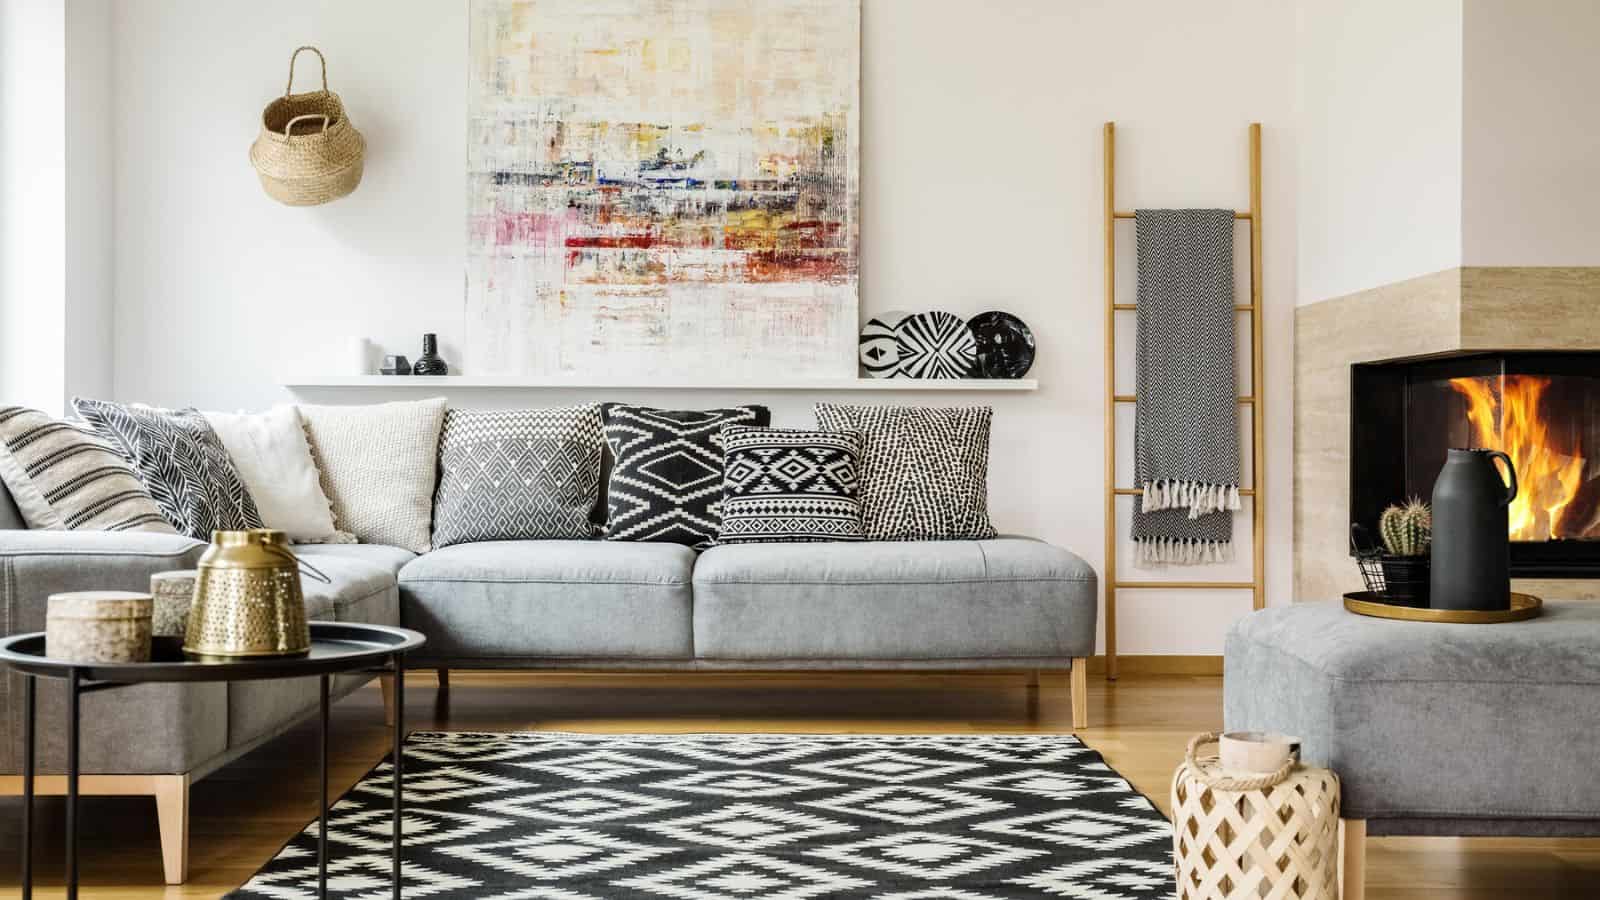
A blanket ladder is a freestanding or wall-mounted ladder-like structure, designed specifically for organizing and showcasing your favorite:
- Blankets
- Quilts
- Throws
It serves as a stylish alternative to traditional blanket storage methods and adds a touch of farmhouse charm and coziness to your home décor. Blanket ladders come in various styles and sizes, allowing you to find the perfect fit for your space. You can choose what works best for you:
- Leaning ladder against a wall
- Mounted ladder secured to the wall, or
- Hanging ladder suspended from the ceiling
Now that you know what a blanket ladder is, you’re one step closer to transforming your house into the beautifully organized home you’ve always dreamed of!

Supplies You’ll Need to Build Your Own Blanket Ladder
Alright, time to explore the supplies you’ll need for your DIY journey to building your very own blanket ladder.
1. Wood
Choose high-quality pine boards or another suitable wood material for the ladder structure. The dimensions will depend on the desired size of your ladder.
2. Screws, Nails, and Wood Glue
Select appropriate wood screws and nails to assemble the ladder securely. This means paying attention to what type and size of screws you need for the different joints. Additionally, applying wood glue will reinforce the joints and ensure stability, making it a must in households with kids. Make sure you have a hammer and a screwdriver on hand, too.
3. Stain or Paint
Select a finish that matches your desired aesthetic and complements your house interior. Dark walnut stain is a popular choice for a rustic look, but you can select any color stain or paint to match your decor.
4. Drill
A power drill with drill bits is essential for creating pilot holes and driving screws during the construction process. There are very reliable and lightweight options available on the market, like this one that has great ratings.

5. Cutting Tools
Having a miter saw or circular saw available will make it easier to complete any necessary cuts.
6. Measuring Tools & Marking Tools
Use a tape measure, ruler, or combination square to take accurate measurements and ensure precise cuts. Otherwise, you risk the pieces not fitting together correctly.
For marking, you can use pencils or wood markers. Here are some of my favorites:
- Carpenter Pencils
- Ticonderoga Pencils (my favorite for homeschooling and everyday use)
And don’t forget to use a level. This way, you’re building a stable and reliable piece of furniture. Grab yours here:
7. Safety Gear
Don’t forget to prioritize safety by wearing gloves and safety goggles when handling tools and materials. They’ll help you avoid injuries and protect your eyes and sensitive skin.
8. Sandpaper or Sander
Smooth the surfaces and edges of the wood using sandpaper or a sander to create a polished finish. When you’re using sandpaper or sander, confirm you’re in an open or well-ventilated space. You might want to wear a face mask, too. I prefer using a sander, not sandpaper. It’s quicker, and the end result looks and feels better to me when compared to sandpaper.
9. Optional
If you plan to use the blanket ladder for storing items heavier than your bed covers (like plants or books, for example), you might want to add extra support. Consider using brackets or corner braces like these.
By gathering these supplies, you’ll be well-prepared to dive into your DIY quilt ladder project. So, grab your hammer, prepare a checklist, and tick off everything you need before you start the construction process.
Last but not least, I’ve even created a printable template you can use for planning your project.
How to Build a Blanket Ladder
Ready for action? It’s time to start building your DIY blanket ladder! Follow these step-by-step instructions and soon, even if you’re a beginner, your beautiful DIY project will come to life.

Step1: Planning and Measurements
- Start by determining the desired height and width of your ladder. Consider the available space, plan a few inches on the sides, and the number of blankets you want to display.
- Measure and mark the dimensions on your wood boards carefully (a good pencil is your best friend here) and a few times before cutting, especially on angles. This is the best way to avoid mistakes.
2 Step: Cutting and Assembly
- With the measurements in hand, use a miter saw or circular saw to cut the pine boards to the appropriate lengths. Take your time to make clean and precise cuts. Wear safety goggles and follow proper safety precautions while cutting and sanding.
- Next, align the boards to form the sides of the ladder, ensuring they are parallel.
- Secure the ladder rungs (dowels), spaced evenly, using wood screws and wood glue. Consider using a drill with a pilot hole bit to prevent splitting. Use a level to ensure the ladder sides are straight and the rungs are aligned.
3 Step: Finishing and Staining
- Once the ladder is assembled, smooth it by lightly sanding all surfaces. Take your time for the process and pay attention to every corner and sharp edge. Remove any rough spots or splinters.
- Wipe away any dust or debris from sanding.
- Apply your chosen stain using a brush or cloth, following the manufacturer’s instructions. If you aim for a rustic blanket ladder look, then search for darker stain colors. Apply additional coats for a darker hue, allowing each coat to dry completely.
4 Step: Final Touches
- Once the stain is dry, you can add an optional coat of polyurethane to preserve the wood, enhance its durability, and give it an even more polished look.
- With the ladder fully assembled and finished, position it against a wall, mount it securely, or hang it from the ceiling using appropriate hardware, based on your chosen ladder style.
- Inspect the ladder for any rough spots or protruding screws. Sand or file them down for a seamless finish.
- Consider adding protective pads or bumpers to the bottom of the ladder to prevent scratching or sliding.
Congratulations! You’ve successfully built your own wooden blanket ladder. Now it’s time to move on to the next section and discover creative ways to use and style your ladder.
How to Use a Blanket Ladder
Now that you’ve built your own blanket ladder, it’s time to put it to good use. Here are a few ways you can effectively utilize your ladder for organizing and displaying your blankets:
Leaning Blanket Ladders
- Place the ladder against a wall, leaning it at a slight angle for stability.
- Arrange the blankets based on color, texture, or size for a stylish and organized look.
Mounted Blanket Ladders
- Secure the ladder to the wall using appropriate hardware and mounting techniques.
- Hang your blankets on the rungs, spacing them evenly and displaying them in a way to complement the room’s decor.
- Consider adding hooks or clips to the ladder sides for hanging smaller items like decorative accents or Christmas stockings.
Hanging Blanket Ladders
Use this method for a unique and eye-catching display. This is a fantastic solution for rooms with limited floor space.
- Suspend the ladder from the ceiling using sturdy ropes, chains, or hooks.
- Attach the ropes or chains to the ladder sides and adjust the height to your preference.
Where to Buy Pre-Made Blanket Ladders
If you’re not really into DIY or just don’t feel like dealing with all the hassle that comes with it, you can purchase a pre-made blanket ladder instead of building one yourself, there are several options available. Here are some of my favorite designs from Amazon:
1. 6-Foot Wall Leaning Blanket Ladder
- Premium laminated wood
- Minimalistic design
- Hinged design for easy storage
To get yours, click here.
2. 5-Tier Leaning Ladder Shelf Bookshelf
- Retro wood laminate
- Suitable for any room
- Sturdy metal legs
3. Decorative Blanket Ladder Towel Rack Holder
- Lightweight and compact
- Great for unused corners or awkward areas
- Metal construction with anti-slip pads for stabilization
- Easy assembly
You can find this one here.
4. Blanket Ladder Outdoor Towel Rack
- Turns clutter into decor
- Adds character to your room
- Metal with a rust-resistant finish
- Non-slip feet to prevent scratching
Order yours here.
Other places you can look for blanket ladders:
- Home Improvement Stores
- Specialty Home Decor Stores
- Local Furniture and Antique Shops
- Handmade and Artisan Shops
- Online Marketplaces
Congratulations on completing your DIY blanket ladder! I hope it’s already one of your favorite projects ever. Now, it’s time to sit back, relax, and enjoy the cozy atmosphere your blanket ladder brings to your home. Remember, a blanket ladder provides practicality and adds a touch of farmhouse charm to your space. Whether you’ve chosen a leaning, mounted, or hanging blanket ladder, make sure to arrange your blankets in a way that reflects your personal style. Don’t be afraid to experiment with different arrangements, baskets, organizers, or add a flower pot. The possibilities are endless!
Where are you going to install your blanket ladder? Are you going to make it yourself or are you going with the convenient pre-made options? I can’t wait to hear about it in the comments below!
Did you enjoy building this blanket ladder DIY? Then, you’re going to love these other posts, too:
- DIY Pen Organizer Toothpaste Hack
- DIY Peppermint Sugar Scrub & Free Printable Labels
- DIY Glitter Pine Cones
- 8 Ways to Start Loving Your Home Even If It’s Not Perfect
- 9 Clutter-Free Home Organization Hacks
The post How To Make Your Own Blanket Ladder and Save Hundreds appeared first on Happy Organized Life.