

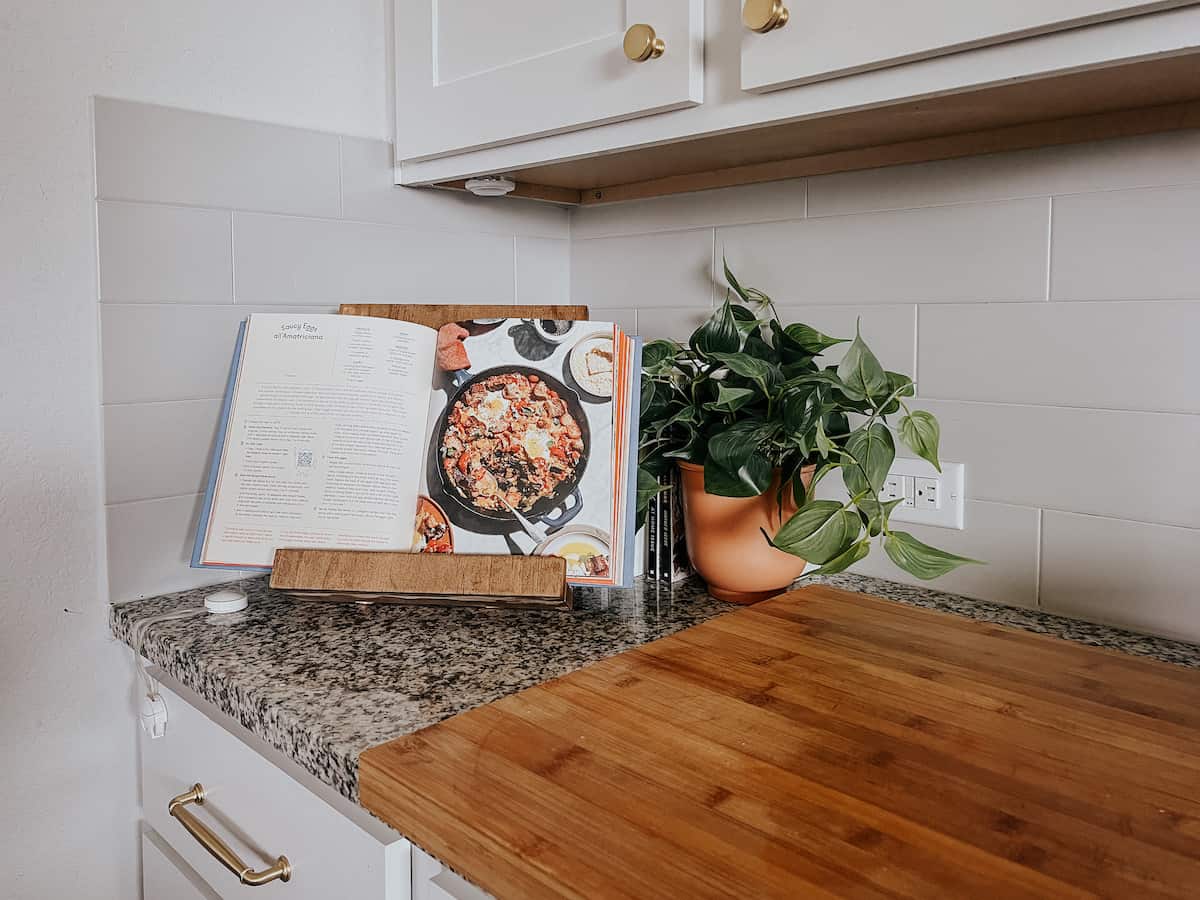
Every time I use a cookbook in my kitchen, I feel like I’m living in an infomercial. You know the one – the cookbook won’t stay open, I’m dropping things and fumbling all over the place. It’s not fun. I’ve wanted to create a cookbook stand for a long time now but I kept putting it off. Until now! And just like in the infomercials, my life is basically changed forever.
This post is sponsored by DAP.
I love trying out new recipes, and Corey has a collection of some of the best cookbooks around. But man, it’s one of the most annoying things ever to have to spread a cookbook out on the counter, make sure the cookbook pages stay open while I’m trying to read the recipe, and try not to spill the ingredients all over the place.
It’s a mess.
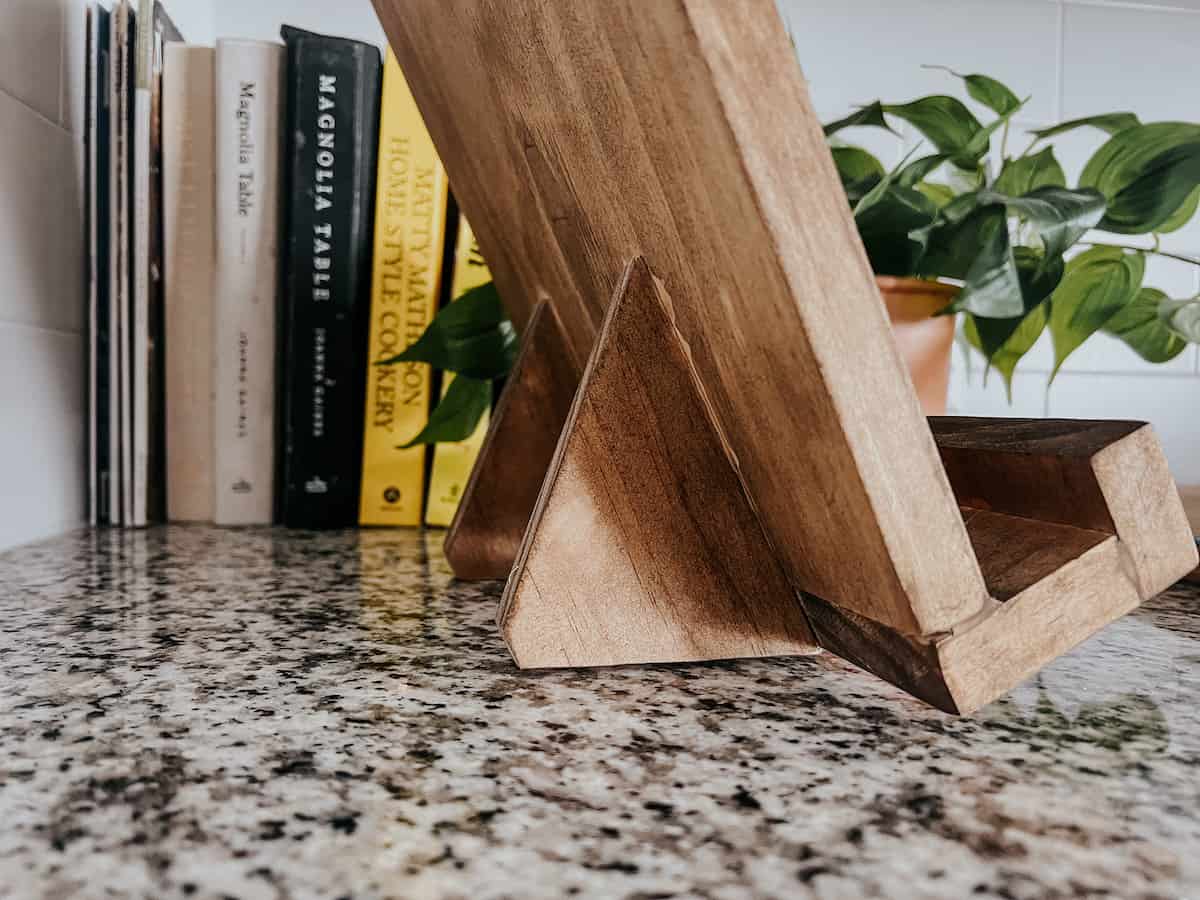
This simple little cookbook holder took me just a few hours to build, required minimal use of power tools, and looks super cute on the counters. It’s a win all around! It’s also a great size for a tablet or other device, so you can avoid getting splatters on them if you prefer to get your recipes from your phone!
Oh, and did I mention I used scrap wood so it was FREE? Doesn’t get any better than that.
DIY Cookbook Holder: Video Tutorial
I compiled all of my Instagram stories from this project into a little video, so you can watch it come together if you’d like. As always, read on for the more detailed step by step tutorial.
How to Build a Cookbook Stand
Tools you’ll need
I used scrap 1×12 for this project, but you can make this happen with almost anything you have laying around!
- Scrap 1×12 wood
- DAP Premium Wood Filler
- Orbital sander or sanding blocks
- Weldwood Instant Wood Adhesive
- Miter Saw
- Stain
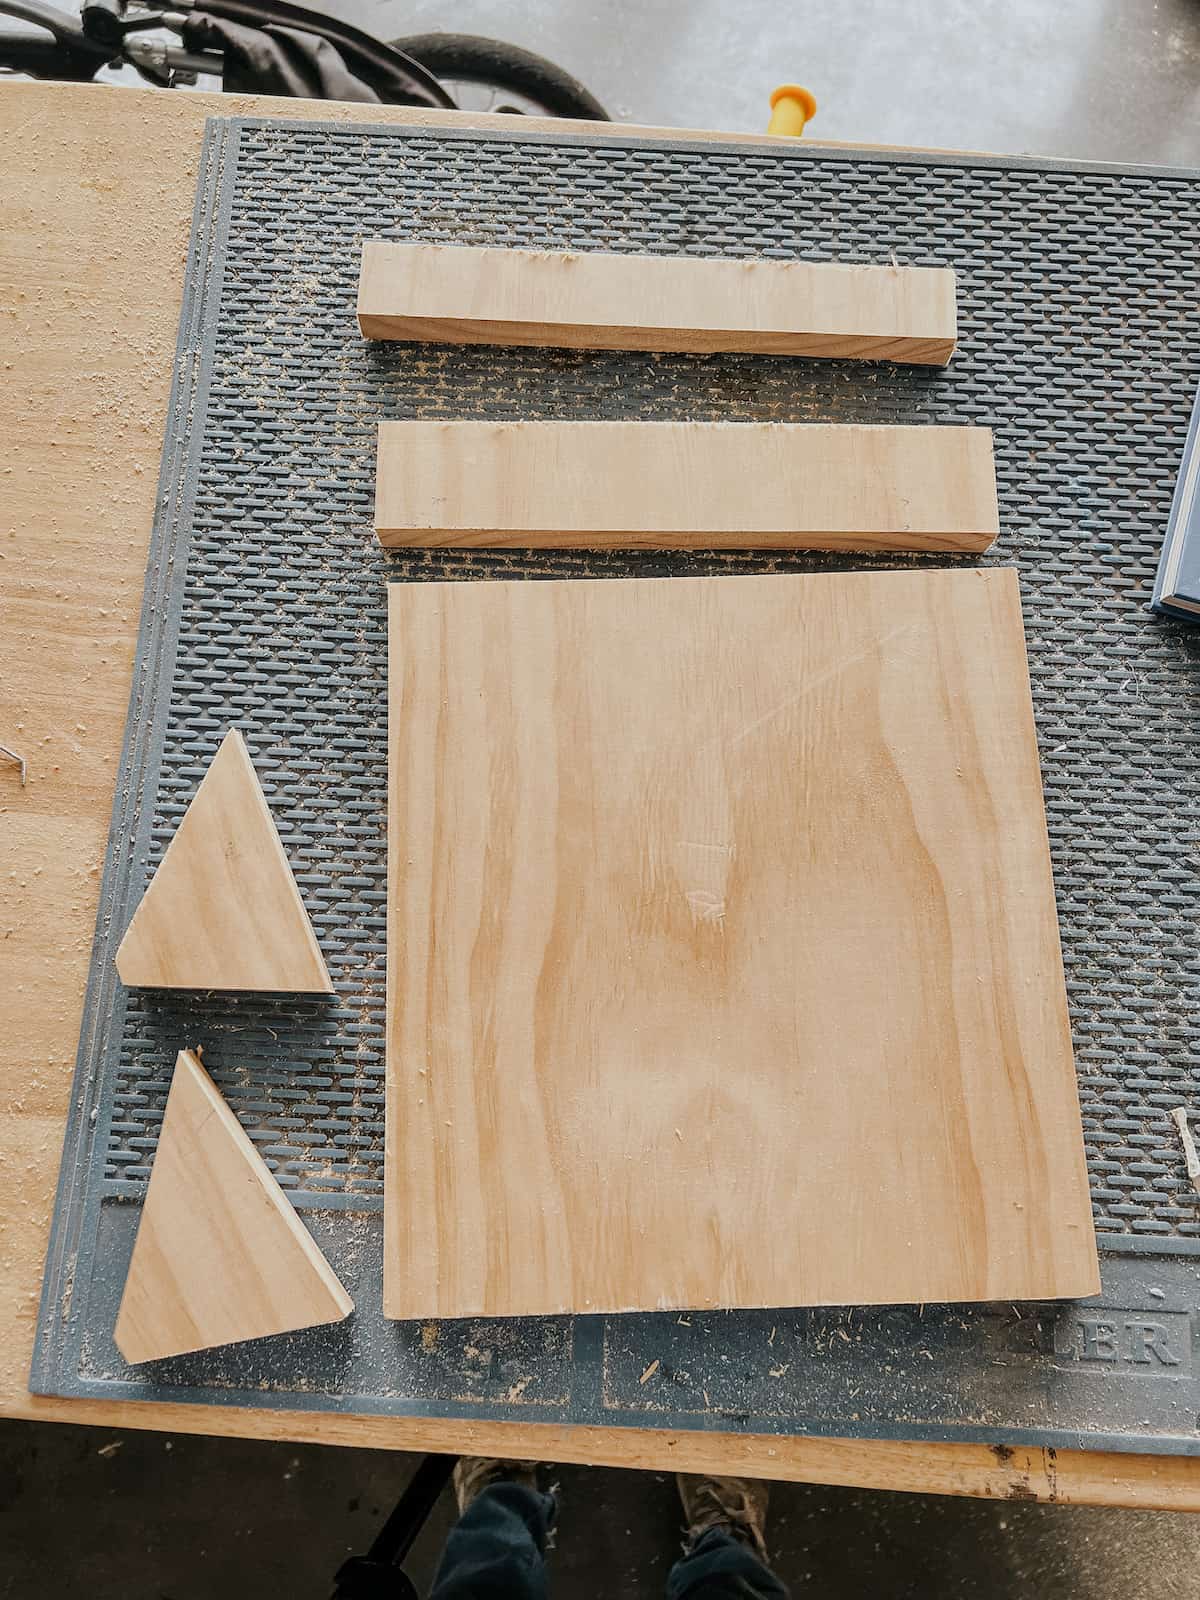
Cut List
Here’s a breakdown of how I cut my 1×12 wood to create this cookbook stand:
- (1) 12″ long piece
- (1) 3″ long piece
- (1) 2.5″ long piece
- (2) 5″ x 3″ pieces, with angles cut into sides (see details below)
Again – if you don’t have scrap 1×12, you could use a Kreg Jig to attach a few pieces of smaller wood together for the backing. You could use 1×3 or 1×2 wood for the support pieces. Get creative with it – you could make all sorts of custom sizes depending on your needs!
I just used some scrap pine for this project – if you want to get fancy, a walnut cookbook stand would be gorgeous.
Step One: Cut Wood And Sand
Your first step will be to cut down your scrap wood according to the cut list above, and then thoroughly sand it. It’s always easier to sand your wood pieces prior to assembling a project like this!
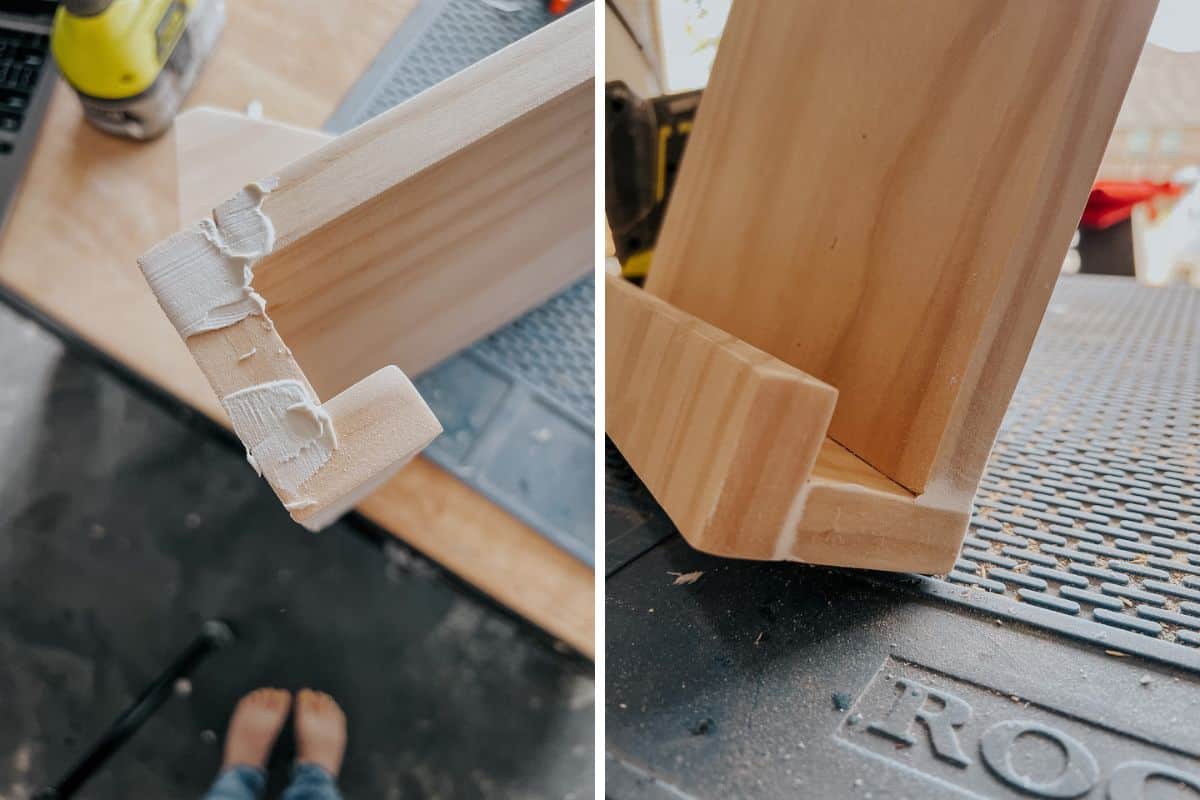
For stability, you’ll need to add two little feet on the back. There’s genuinely no right or wrong way to cut these, but you’ll want an angle on the bottom of them to allow the cookbook stand to lean back a bit. Here’s how I cut mine:
- I cut a piece of my 1×12 to 5″ long.
- Then, I cut two 3″ pieces widthwise from that piece.
- From one side of each piece, I cut a 20-degree angle (this is so the stand can lean back a bit)
- From the other side of each piece, I cut a 45-degree angle. This is purely decorative!
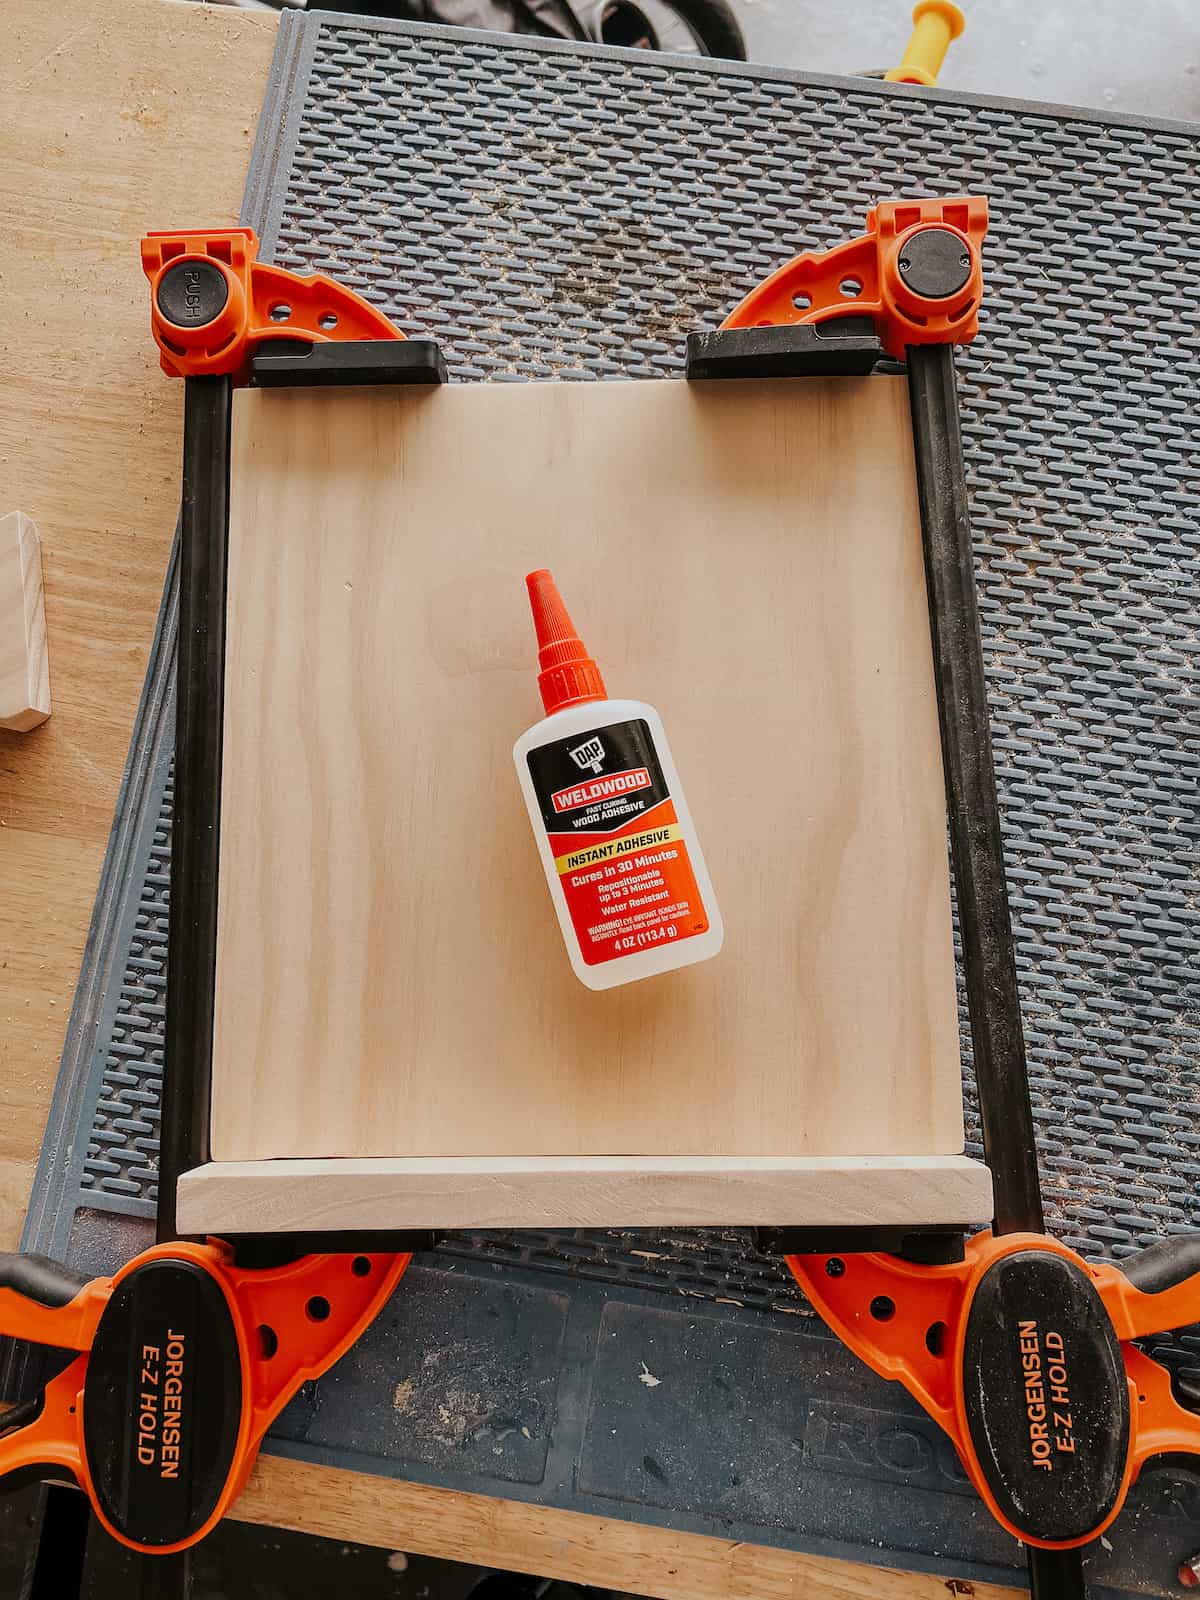
Step Two: Assemble the Cookbook Stand
Once all of your wood is cut and sanded down, it’s time to assemble. I used Weldwood Instant Wood Adhesive for this. It’s so quick and easy to use, and it’s strong enough to handle this kind of project really well!
All you need to do is apply a bead of glue to one of the pieces, then use clamps to hold the two pieces together for 30 minutes while it dries. You can also use a pin nailer to hold the wood in place, but I find that clamps get a better hold, and don’t leave any nail marks behind!
This is hands down the easiest way to assemble a cookbook stand – and I love that it requires absolutely zero knowledge of power tools.
Above, you’ll see how I assembled the three main pieces of the cookbook stand. If you want, you could swap out that front piece for an acrylic shield instead – it would allow you to still see the recipes and protect the pages from rogue eggs.
Don’t pretend like you haven’t gotten egg all over your favorite recipes before.
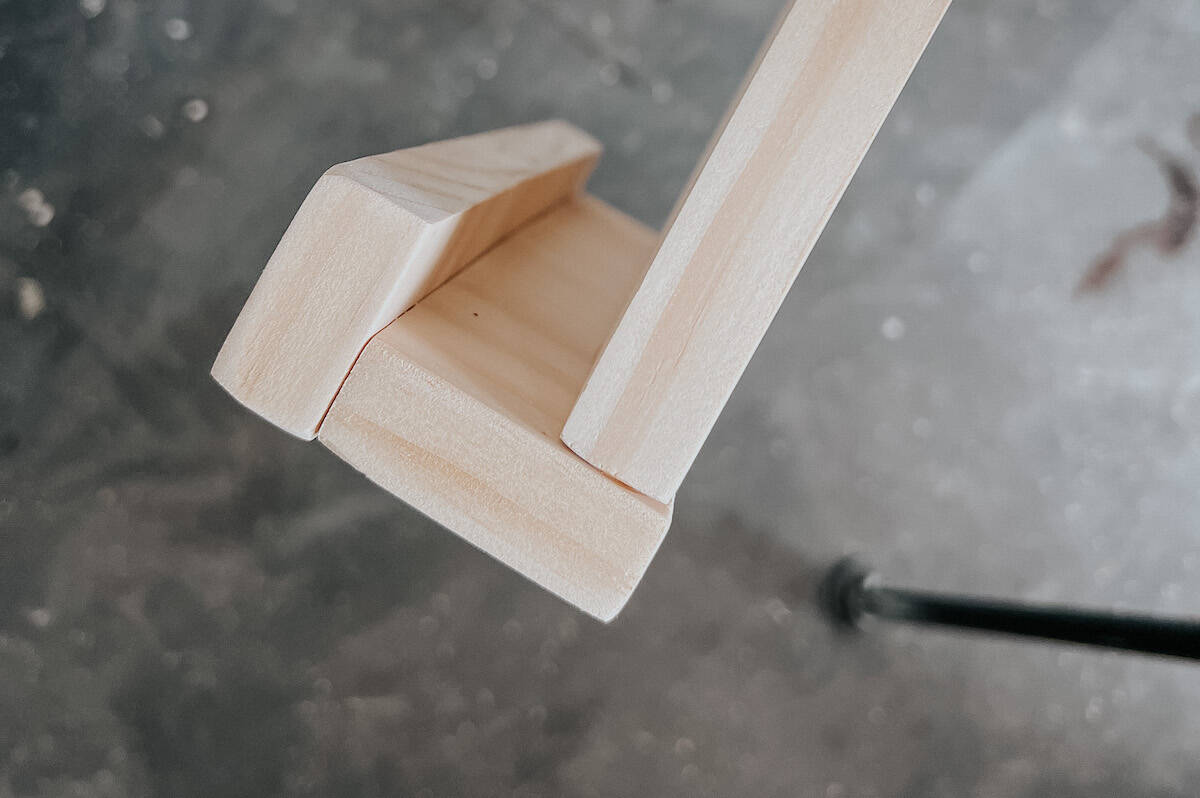
Step Three: Add the Supports
With the base of the cookbook stand complete, it’s time to add the little legs to the back!
It’s much harder to clamp these pieces on, so for this part I’d recommend either using a pin nailer to help hold them in place while the glue dries, or using wood glue and screws. If you use screws, just be sure to pre-drill your holes!
I used a pin nailer and it worked like a charm. I just measured where I would need to nail in from the front, then glued the pieces in place and nailed from the front of the cookbook stand directly into the legs. The nails are more or less invisible, especially since there will usually be a cookbook covering them up!
Step Four: Finishing Touches
The final step is to add a few finishing touches that will really make your cookbook stand feel like it could have come straight from Williams-Sonoma.
You’ll start by using DAP Premium Wood filler to fill in all of the gaps and seams. Fill in the nail holes too, if you ended up using nails!
Why take this extra step? Because it’s what really makes things feel seamless (pun intended) and elevated. It’s not a fully necessary step on a project like this, but I think it’s always worth it to take the extra time for the little steps like this.
After applying the wood filler and letting it dry completely, sand it down so it is smooth and marvel at how faaaaaaaancy it looks.
Finally, you’re ready for stain! You can paint this if you prefer, but I love to bring in warm wood tones to my kitchen. I went with my go to stain, Dark Walnut.
Once it’s all dry, you’re done. You’ve got yourself one of the best cookbook stands you could possibly have, and it’s fully custom. Does it get any better?!

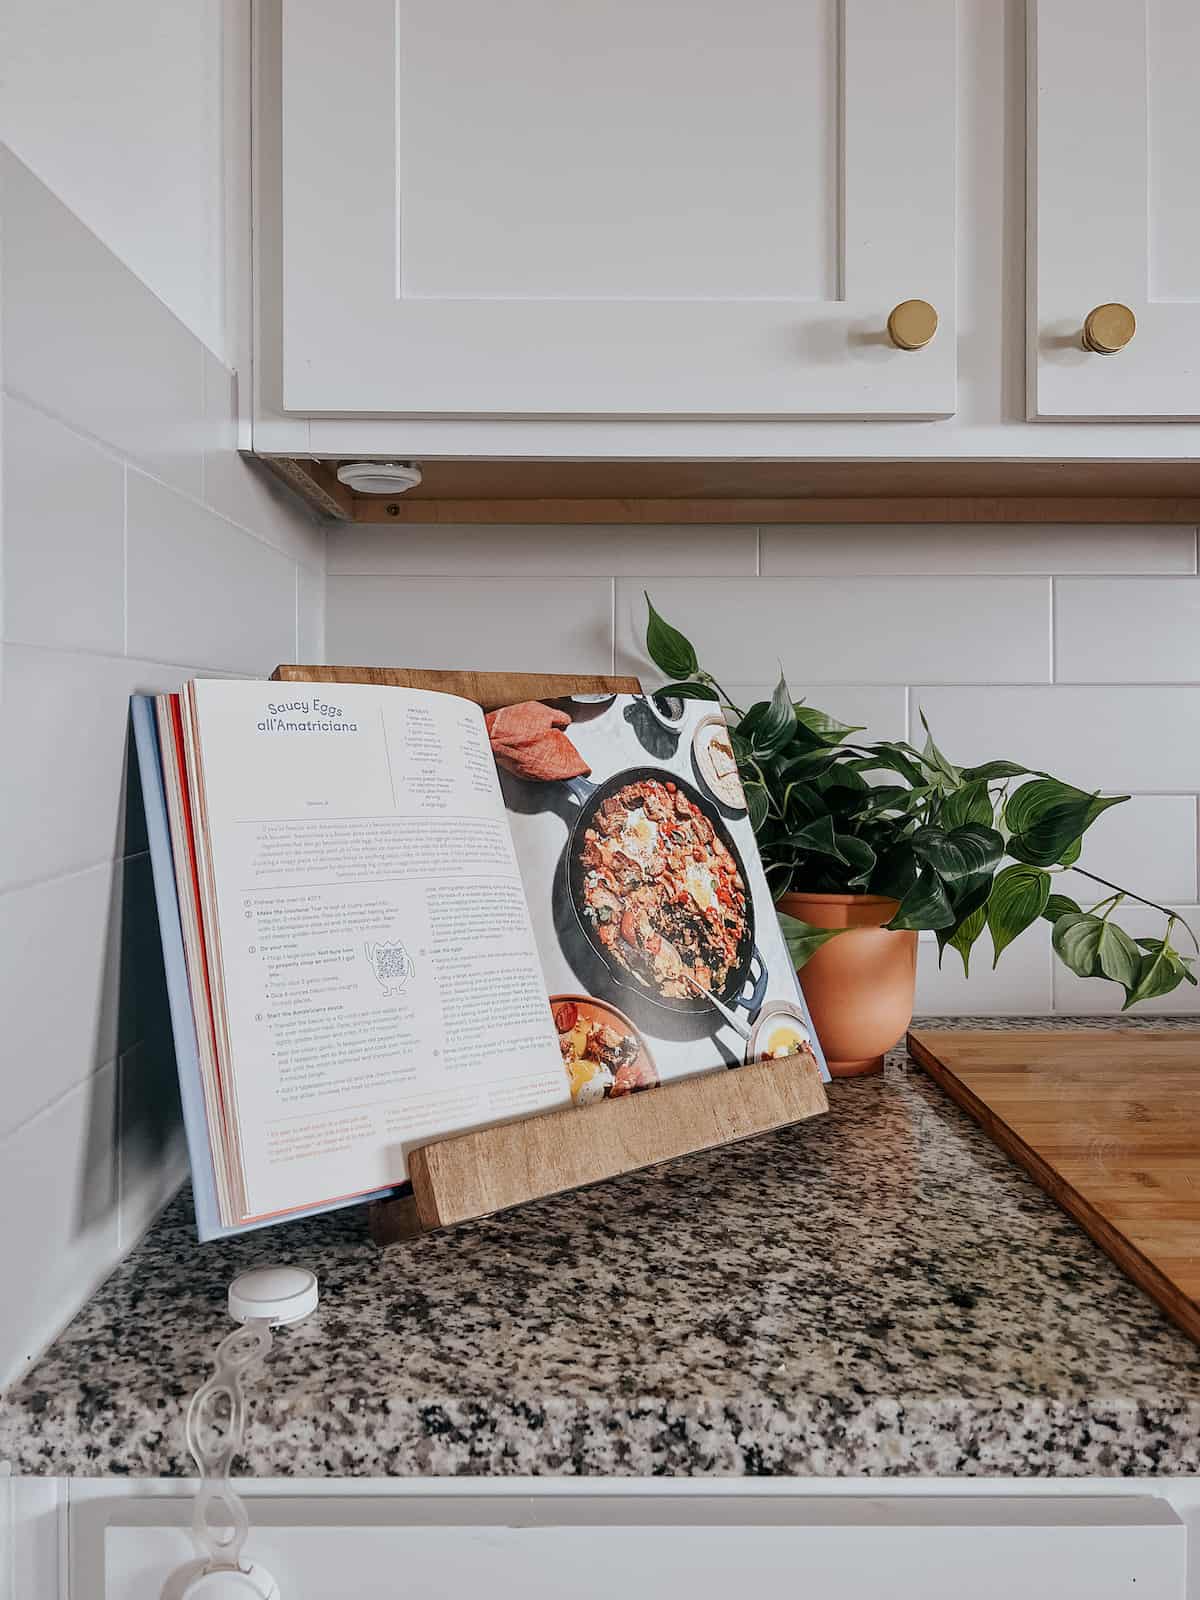
This project would make an awesome gift for Mother’s Day, a birthday, or any other gift-giving occasion. Pair it with a favorite cookbook or a set of recipe cards with a few favorite recipes already filled in. It would look beautiful on an open shelf in a kitchen, and it lays nice and flat for easy storage if you’d prefer to keep it in the cabinets!
I have a feeling we’ll be using our cookbooks a lot more often now. Just having this cookbook stand in the kitchen is giving me all sorts of inspiration! Special thanks to DAP for being the most reliable, easy-to-use wood glue and wood filler brand around. They made this project so easy!
The post How to Build a Simple Cookbook Stand appeared first on Love & Renovations.